Showing posts with label Tecno. Show all posts

Tecno Camon C9 Coming With a Finger Print Scanner & Dual Selfie Camera

Success without a successor doesn’t mean failure, but the successor hasn’t been found. But to Tecno Mobile, there is always a successor and here comes the successor in the Camon’s family which boasted an unmatched camera quality among other thrilling features.

Just like the way Camon C8 surpassed any other smartphone out there in the market at the time and claimed all the recognition that could possibly exist from picture lovers.

If you are possibly a selfie lover, photography lover, then you should have a Camon's testimony to share, and more testimony awaits you.


Tecno Camon C9 is coming and the feature we’re excited about the most is the dual camera that may even be rotatable. According to leak info from our sources, Camon C9 will come with dual flash which will entirely mock every other smartphone in the market.


ALSO READ: HOW TO GET AS LOW AS 10GB FOR 2500 ON GLO 


Dual Camera
Rumor has it that both front cameras will have 13MP, which will be awesome for selfie lovers. Dual 13MP front camera is unbelievably huge and innovative. It would be the first time a Chinese OEM will create a dual selfie camera smartphone in the world.

A Rotating camera
Camon C9 can be turned inside out. It also means that the back camera will be able to adjust different angles to take pictures.


Wider Angle Selfie Camera
Camon C9 will feature wider angle selfie shooter which will ensure that you can capture more people in a single picture and also take panoramic pictures with friends scattered all around.


Finger Print Scanner

Finger print scanner was also spotted embedded below the rear camera of the Camon C9.


For now, no much is known about the technical specification but surely, it will be a miracle if it escape 1GB ram, 5.5inches and lot more. Don’t too worry, Tecno camon c9 will amaze you the way you’ve never expected.
fingerprint recognition scanner embedded just below the rear camera of the Camon C9.

If You Enjoyed This Post Please Take 5 Seconds To Share It.

TECNO Camon C8 HiOS OTA Upgrade Guide - Beta Version

Tecno Camon C8A HiOS Beta Version to make your TECNO phone be unique smarter and fun. This Beta size is around 40M. Official version will be released in around 7-10 days.


Requirements
>>Ensure your Device is fully charged or at least about 90% charged.
>>Back up your data, files and every before you proceed.
>>Make sure you are not rooted(not compulsory) to be on a more safer side.

Where Can I Download it?
>>OTA Upgrade version for Build number: C8-H352-A2-L-20160118 only (download here)

>>TCard update version for other built number (download here)
>>HiFlash tool, download here

STEPS
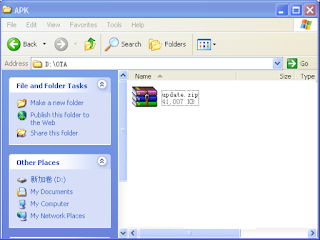
>>Download and unzip the OTA differential package you downloaded from the above link
2. Place update.zip into SD Card root.

3. Insert SD card into mobile T-card slot.
4. With mobile powered off, hold power and volume-up buttons at the same time until startup animation appears.

5. Android and warning label appears.

6. Hold power button alone for 2 seconds then press volume-up without releasing the power button key to enter the following interface.


7. Press volume-down key to select “apply update from SD card”.

8. Press power button to enter the following interface, then press volume-down key to select “Tcard_update.zip”.

9. Press power button to confirm selection for the following interface.

10. Interface automatically changes after process is complete; default selection is set to “reboot system now”, as show in the picture.

11. Press power button to restart and initiate OS.
12. Select “Settings” and then “About Phone”. A change in version number indicates the upgrade was successfully completed.
If you encounter any problems, kindly comment and you'll be proffered with solution.

10 universal method to root your device

 good evening, guess i haven't wish everyone here HAPPY NEW YEAR, lol, i just did.
 Nowadays, rooting of android smartphones seems to be a little bit compulsory compared to it's advantage after rooting.
In this post, I would be dropping most common rooting process and devices it work perfectly on (to get your device rooted), so feel free to make use of any method incase the first one you tried didn't work for you. 

Before you read further, let me explain to you  the advantages and disadvantages in rooting your android smartphone, then after reading through, it would be left for you to decide if to root it or not.


cara-root-android-galaxy-mini

Advantages of rooting your android device:


- It also helps to freeup memory

- It runs special application, especially those in HD grafix and also much more beneficial apps that works on rooted device only

- It's also an advantage in terms of custom roms by speeding up the processing speed of your android smartphone.


Disadvantages of rooting your device:

- It voids your device warranty

- It involve the risk of bricking your device.


guess you know the adv and disadvantages of rooting your device,if you've made your choice then continue reading.
you can always stay turned (subscribe to our blog feed) for post on how to un-bricked your device .


LIST OF DEVICES AND ROOTING PROCESSES TO ROOT IT PERFECTLY


***How to root Tecno F6, H3, H6, L7, P9(4.4), Phantom Z (A7)***

1. Download Kingroot 
2. Install the app on the phone 
3. Ensure you have an internet connection on the phone then launch the app 
4. Wait for all checks to be complete 
5. Click the center button (with Root and some Chinese texts inscribed on it) to begin rooting 
6. Wait for rooting to complete 
7. You should see a green tick to confirm that rooting was successful


1.  How to root Tecno D9, Phantom pad II (G9

1. Download Root Master 
2. Install it on the phone 
3. Ensure you have an active internet connection then launch it 
4. Click the Root button 
5. Give it a few seconds and your phone should now be rooted


  2.  HOW TO ROOT SAMSUNG GALAXY NOTE

First download usb driver for galaxy Note 3 to backup your files....

Get the appropriate file for your Note 3 model, which can be checked from Settings>About phone>Phone identity>Model number, then select the compatible one for you device from the below:
SM-N900 (International Exynos): CF-Auto-Root-ha3g-ha3gxx- smn900.zip
SM-N9005 (International Qualcomm): CF-Auto-Root-hlte-hltexx- smn9005.zip
SM-N900T (T-Mobile US): CF-Auto-Root-hltetmo-hltetmo- smn900t.zip
SM-N900S (untested): CF-Auto-Root-hlteskt-hlteskt- smn900s.zip
SM-N900W8 (untested): CF-Auto-Root-hltecan-hlteub- smn900w8.zip
SM-N9002: CF-Auto-Root-hlte-h3gduoszn-smn9002.zip
SM-N9006 (untested): CF-Auto-Root-hlte-h3gzc-smn9006.zip
SM-N9008 (untested): CF-Auto-Root-hlte-h3gzm-smn9008.zip
SM-N9009 (untested): CF-Auto-Root-hlte-h3gduosctc- smn9009.zip

- Download and unzip the respectiveCF-Auto-Root-....zip file for your device
- If you end up with arecovery.imgandcache.imgfile, you've extracted twice. You need to end up with a.tar.md5 file - don't extract that one
- (USB) Disconnect your phone from your computer
- Start Odin3-vX.X.exe
- Click the PDA button, and selectCF-Auto-Root-....tar.md5
- Put your phone indownloadmode (turn off phone, then hold VolDown+Home+Powerto boot - if it asks you to press a button to continue, press the listed button, or runadb reboot downloadcommand)
- (USB) Connect the phone to your computer
- Make sureRepartitionisNOTchecked
- Click the Start button
- Wait for Android to boot...

    3. HOW TO ROOT GIONEE P2

REQUIREMENTS
=> Internet connection on PC and your gionee P2, Rooting tools and drivers.
=> links to usb drivers: pdanet.exe
=> Motochopper: MOTOCHOPPER

Enable usb debugging in developer mode
1. Install the USB drivers to your computer, during the installation when you get a dialogbox requesting for device type Select ‘OTHERS’ and connect your phone to the PC then click on next until installation is complete
2.Extract the content of ‘motochopper.zip’ to your desktop and execute the ‘run.bat’ file the file will guide you through the rest of the process.

   4. HOW TO ROOT OPSSON D1

Follow the below steps...
1. Download One Click Root
2.Connect your Opsson D1 to the computer using your Micro-USB/USB cord
3. Enable USB Debugging mode for your device
*.Go to your Settings App
*.Go to Applications
*.Go to Development
*.Place a Check Mark on the box beside USB Debugging / Android Debugging
4.Run One Click Root software than click 'Root Now'

   5. HOW TO ROOT SONY XPERIA

1. Download Easy Rooting Toolkit and extract the zip: DooMLoRD_Easy-Rooting- Toolkit_v17_perf-event-exploit.zip2.Download and install latest Sony USB Drivers on your computer: Download3.Turn on USB Debuggingon your device
4.Also, turn on Unknown Sources option from device Settings> Security>
5.Go to display settings and increase screen timeout to 15 minutes.
6. Connect your phone to computer via USB cable.
7. Now open the Easy Rooting Toolkit folder and double click the“runme”batch file depending on the OS of your computer. For example, if you are a Windows user, click on“runme_win.bat”file.
8. You will then see a cmd window, asking you to press any key.
9. Just obey it blindly and it will run the rooting script that will push SuperSU and Busybox into your device.
Your Xperia device should now be rooted. This works on almost all Xperia device, below is the list of Xperia device this root method is tested on:

*.Xperia Z (C6602/3) {FW: 10.3.A.0.423} [v16 onwards]
*.Xperia Z (C6602/3) {FW: 10.1.1.A.1.307} [v10 onwards]
*.Xperia Z (C6616) {FW: 10.1.1.A.1.319} [Bell Canada] [v19a]
*.Xperia Z (C6606) {FW: 10.1.1.B.0.1.166} [v17 onwards]
*.Xperia ZL (C6503) {FW: 10.3.A.0.423} [v12 onwards]
*.Xperia ZR (M35h) {FW: 10.1.1.A.1.317} [v17 onwards]
*.Xperia ZR (C5502/C5503) {FW: 10.1.1.A.1.317} [v16 onwards]
*.Xperia Tablet Z (SGP311/2) {FW: 10.1.C.0.370} [v13 onwards]
*.Xperia Tablet Z (SGP321) {FW: 10.1.1.A.1.307} [v13 onwards]
*.Xperia SP (C5302) {FW: 12.0.A.1.284} [v11 onwards]
*.Xperia SP (C5302/3/6) {FW: 12.0.A.1.211/257} [v16 onwards]
*.Xperia T (LT30p) {FW: 9.1.A.1.141} [v13 onwards]
*.Xperia T (LT30p) {FW: 9.1.A.1.142} (added by the_laser) [v14 onwards]
*.Xperia TX (LT29i) {FW: 9.1.B.1.67} (added by sj8023ld) [v14 onwards]
*.Xperia TX (LT29i) {FW: 9.1.B.0.411} (added by fi01) [v14 onwards]
*.Xperia V (LT25i) {FW: 9.1.A.1.140/142} (added by the_laser) [v14 onwards]
*.Xperia V (LT25i) {FW: 9.1.A.1.145} [v16 onwards]
*.Xperia Ion (LT28h) {FW: 6.2.B.0.211} [v16 onwards]
*.Xperia S (LT26i) {FW: 6.2.B.0.211} [v10 onwards]
*.Xperia S (LT26i) {FW: 6.2.B.0.200} [v16 onwards]
*.Xperia SL (LT26ii) {FW: 6.2.B.0.200} [v17 onwards]
*.Xperia SL (LT26ii) {FW: 6.2.B.0.211} (added by the_laser) [v14 onwards]
*.Xperia Acro S (LT26w) {FW: 6.2.B.0.200} [v13 onwards]
*.Xperia Acro S (LT26w) {FW: 6.2.B.0.211} [v16 onwards] [FIXED]
*.Xperia P (LT22i) {FW: 6.2.A.1.100} (added by the_laser) [v14 onwards]
*.Xperia Go (ST27i) {FW: 6.2.A.1.100} (added by the_laser) [v14 onwards]
*.Xperia Go (ST27a) {FW: 6.2.A.1.100} (added by DooMLoRD, untested) [v14 onwards]
*.Xperia J (ST26a/i) {FW: 11.2.A.0.21/31} (added by DooMLoRD, untested) [v17 onwards]
*.Xperia L (C2104/5) {FW: 15.0.A.1.31/36} (added by DooMLoRD, untested) [v17 onwards]
*.Xperia AX (SO-01E) {FW: 9.1.C.0.473} (added by fi01) [v14 onwards]
*.Xperia Z (SO-02E) {FW: 10.1.D.0.343} (added by fi01) [v14 onwards]
*.Tablet Z (SO-03E) {FW: 10.1.E.0.265/269}(added by fi01) [v14 onwards]
*.Xperia GX (SO-04D) {FW: 7.0.D.1.137} (added by fi01) [v14 onwards]
*.Xperia A (SO-04E) {FW: 10.1.1.D.0.179} (added by fi01) [v14 onwards]
*.Xperia A (SO-04E) {FW: 10.1.1.D.2.26} [v16 onwards]
*.Xperia SX (SO-05D) {FW: 7.0.D.1.137} (added by fi01) [v14 onwards]
*.Xperia VL (SOL21) {FW: 9.1.D.0.395} (added by fi01) [v14 onwards]
*.Xperia VL (SOL21) {FW: 9.0.F.0.226} [v16 onwards]
*.Xperia VL (SOL21) {FW: 9.1.D.0.401} [v16 onwards]
*.Xperia UL (SOL22) {FW: 10.2.F.3.43} (added by fi01) [v14 onwards]

  6.  HOW TO ROOT SAMSUNG GT- 5360

 Follow the below procedure

1. Download the necessary rootpackage here.
2. Copy the downloaded update.zip file to the top folder of the microSD card –do not extract it.
3. If plugged in, unplug the handset from the PC and turn it off.
4. Put it into recovery mode – to do this, press and hold the volume up key + homekey (the middle buttonon the frontof your device) and press the power button until it goes into recovery mode.
5. Select Apply update from SD card and locate the update.zip file you copied to the microSD card. Press the volume up or down to navigate and then the power buttonto select the option.
6. Let the rooting process complete. When done, select Reboot system now to restart the device.
Your Galaxy Y should now be rooted!!

  7.  HOW TO ROOT OPTIMUS F3

Download the LG drivers and install them onto your PC (if you haven’t done so already). The LG USB drivers can be found at this link.

=> Your LG Optimus F3 needs to be in USB debugging mode. Go to Settings, then Developer options, and then check the 
      box that says USB debugging.
=> Have your micro USB cable handy.
=> Download the root package, and extract it to a folder onto the desktop of your PC. Title the folder ‘motochopper’. The  
      root package can be found by following this link.

How To Root LG Optimus F3

Plug your LG Optimus F3 to your PC using your micro USBcable.
Check that you have USB debugging enabled.
Navigate to the ‘motochopper’ folder in which you extracted the root page to on your Desktop.
Inside the ‘motochopper’ folder, find a file named run.bat and execute it.
Select normal mode, and follow all the instructions that run.bat tells you. Be extra careful and read every detail.
After run.bat finishes what it’s doing on your LG Optimus F3 Plus you’ll have root!
Done!

  8.  UNIVERSAL METHOD OF ROOTING ALL DEVICES WITH FRAMAROOT

=> First Download  FRAMAROOT DOWNLOAD HERE
=> Enter framaroot app then click on bromir a prompt message will appear telling you have successfully root phone you need to reboot system.
=>  Now reboot your device
then its done..

  9.   HOW TO ROOT TECNO PHANTOM WITH PC

=>  First download PDAnet+ Here (It's the driver for techno phamtom, Install it on your PC)
=> Then Download Vroot Here.

Make sure your techno A3 is connected during this procedures above.... Thouth the Vroot is in chinese, you would see root, click on it and wait, then you would know when your device is successfully rooted


  10.  How TO ROOT TECNO Phantom A,  A+ , A2, B3, S7, S9 and D3

 * Download Eroot 
*Download PdaNet 
Enable USB debugging on the phone (Settings > Developer > Tick USB Debugging) 
* Connect the phone to the PC then install PdaNet, you should get a "Drivers successfully installed" message at the end of installation
 * Launch Eroot 
* A root button will appear. If it doesn't, close the PdaNet running from your system tray. 
* Click on the root button and your phone will be rooted in 10 seconds.

NOTE:  Download Root checker to verify if your phone is rooted or not.


incase none of the methods work for  your device, drop the device name/model and lets find a perfect method for it.

How to turn off startup tones in tecno phones


Tecno phones always make annoying sounds when you ON or OFF them. The
sound can embarrass someone. Today I will show you how to stop those sounds. There are basically two
ways to turn off start up sound on Tecno phones. The method for ROOTED phones and the one for NON-
ROOTED phones.

Rooted Phones
1. You will need to install a root explorer e.g ROOT BROWSER, you can search for it on google play.

2. Click on Root Browser and scroll down and click on SYSTEM,


then click on MEDIA. You will see power_off.mp3 and power_on.mp3.


3. PRESS and HOLD "power_off.mp3" untill you see options. Click on RENAME, put a full stop (.) and
disabled will be automatically added to "power_ off.mp3" and it will become "power_off.mp3.disabled".
Click OK. That is all.


4. PRESS and HOLD "power_on.mp3" untill you seeoptions. Click on RENAME, put a full stop (.) and
disabled will be automatically added to "power_on.mp3" and it will become "power_on.mp3.disabled".
Click OK.

You can now Test whether the method is working by OFF and ON your phone.

Non-Rooted Phones

You can download SILENT BOOT TRUSILENT from google play store. It will cancel the sounds perfectly.

REMEMBER: When you reduce your phone volume to zero and you OFF or ON Tecno phones they do not make the start up sounds. But you can easily forget to increase the volume later and may miss some
important phone calls.

hope this help,you can always subscribe to our blog post by submitting  your email @our feed or adding us on our twitter,Facebook page.Any complaint,feel free to use the comment box.


Leaked: Tecno Phantom Z- FullSpecifications, featuresAnd Price

tecno company seems
to climb the ladder to release the
Tecno Phamton Z smartphone
which is powered with an 8-core
processor and has a RAM of 1GB. The Tecno Phamton Z is also the First tecno that seems to come with an operating system of android 4.4 Kitsap and it's another flagship from tecno.
Below is the leaked spec of the tecno phantom Z.


Tecno Phantom Z Full Specifications and Price

Platform:
Tecno Phantom Z is an android
smartphone powered with an operating system (0S) of Android 4.4 Kit kat.

Display features:
It has a display size of
6.0 inches, 720 x 1280 pixels, 220 pixels per inch (PPI) and effective display of 16,000,000 colors

Camera:
It's primary camera is of 16MP, up to 4608×3456-pixel pictures, touch focus, panorama, autofocus, Geo-tagging, face detection, HDR camera with dual-core LED flash. It's secondary camera has a 8MP attached to it with pixels of up
to 2448x3264- picxel pictures.

Memory:
It's internal memory has a ROM of 16GB, RAM of 1GB and Card slot that accepts Micro SD of upto 64GB. It's processor is
powered with Octa-core CPU, Media Chipset.

Multimedia and connectivity:
It's Wlan enabled with Wi-Fi 802.11 b/g/n, WIFI hotspot, With direct, dual-band And it also includes bluetooth
connection, and also accpets MicroUsb V 2.0, includes GPS of A-GPS.
Sensors:
Accelerometer, Proximity.
Data:
2G Network: GSM 850 / 900 / 1800 / 1900 3G Network: HSDPA 850 / 900 / 1700 / 1900 / 2100
NO 4G
It uses a dual sim slot.

Battery type:
4000mAh Li-Po battery.
Extra features:
Messaging SMS, MMS, Email, Push Mail, Im Browser HTML5
Java No
- MP3/WAV/eAAC+/WMA player
- FM Radio
- MP4/H.264/H.263/WMV player
- Document viewer/editor
- Preloaded applications
– Google Search, Maps, Gmail, YouTube,Calendar

Price Tag: Not specified, but it
should range between #50000 - #55000.

Tecno R7 amazing features and full specifications

the new release of this high end
Smartphone,It is the first Smartphone from Tecno to
have the Gorilla glass (anti-scratch glass)
with HD capability.


full specifications of the Tecno R7

Key Features
Android 4.2, Jelly Bean,3.75G Network,1.5GHz
6-Core Processor,5.5” Gorilla Glass
HD,Touchscreen,5.0MP BSI Front Camera & 13MP
BSI Back Camera,16GB ROM + 2GB RAM, Slim
and Stylish Design, Wonderful Self-portrait
Function with Wide Angel Front Camera, Dual
SIM Dual Standby, Gmail, Google Maps

Platform
Operating system : Android 4.2 Jelly Bean
Network : GSM/DCS/WCDMA
Band : GSM900/DCS1800MHz/850M /1900M/WCDMA
Basic Parameter
CPU frequency : 1.5GHz 6-Core Processor
CPU model : Building
Battery
Capacity : 2430mAh
Data
GPRS : Yes
EDGE : Yes
3G : Yes
Size
Dimension : 158*78.5*8.4mm
Memory
ROM : 16GB
RAM : 2GB
MicroSD : Expandable microSD up to 32GB
Camera
Front-facing camera : 5.0MP BSI FF
Rear-facing camera : 13.0MP BSI AF Flash
Light
Video calling : Yes
Display
Size : 5.5”
Material : IPS
Type : CTP
Resolution : 720*1280
Sensor
G-sensor : 3D
Light sensor : Yes
Proximity sensor : Yes
Common Tools
Torch : Support Flash
Calculator : Yes
Calendar : Yes
World clock : Yes
Alarm : Yes
Memo : Yes
Multimedia Message
Email : Gmail
SNS/IM : Customzition
Entertainment

Flash : -
JAVA : -
FM radio : Yes
Voice recording : Yes
E-book reader : system
Games : Preload
Connectivity
GPS navigation : Yes
WIFI(WLAN) : Yes
Bluetooth : Yes BT3.5 USB port
Earphone : Yes
Others : AGPS
Program Files
Carelcare
Opera Mini
Facebook
Flash share
Play store
Gmail
Palmchat
Maps
WhatsApp
YouTube
AF Market
GO keyboard

Do you know..
==> That you can answer any call by
waving your hands over the screen of
your Tecno R7?
==>Did you know that you can unlock the
screen of this device via a simple voice
command?
==>Did you know that Techno R7 comes
with Powerful Multi-task feature that
enables you watch videos while doing other
things like sending messages, pinging, etc
all at the same time.

The price is #42,000 as at the time
of purchase.
I proudly recommend this for every game lovers and people thinking of blogging with their mobile.